Saturday, July 14, 2012

6 months ago someone said something nice about me!!

I stumbled across this post that Lysa did when she received the pot holders I made for an exchange.  It's always great to find out someone is saying nice things about you!
Lysa's blog post about the pot holders I made

Thursday, May 10, 2012

Quilts for my nieces

I don't think I've shown these two quilts yet.  They are quilts I made for my nieces several years ago.

For the pink quilt, I stacked 4 pink rectangles  on top of 4 white rectangles, then cut them randomly with wavy cuts - 7 cuts in all.  Then I sewed them together alternating the pink and white matching curves, and using one of each pattern in the block.  I then squared it up so each block was the same height, not worrying about the width.  I think each block was 10 inches high by 15 inches wide.

Libbie's Quilt Finished! by Quilt Circle
Libbie's Quilt Finished!, a photo by Quilt Circle on Flickr.

Here's a link to a tutorial I put on Flickr stepping you through the process with lots of pictures.

I played with appliqueing circles for the back using the fat quarters of the pink that didn't go as well with the ones I used on the front.  I embroidered the label on one of the circles on the back.
Libbie's Quilt back by Quilt Circle
Libbie's Quilt back, a photo by Quilt Circle on Flickr.
My other niece requested blue and black.

I found this on flicker as a black and hot pink quilt, and adapted it for a bundle of black fat quarters I bought.  I worked out a size and layout where I could get 2 blocks from each fat quarter.  I bought 3 blue fabrics to use for the alternating blocks.

Katie's Quilt, front by Quilt Circle
Katie's Quilt, front, a photo by Quilt Circle on Flickr.

Katie's Quilt, back by Quilt Circle
Katie's Quilt, back, a photo by Quilt Circle on Flickr.
For the back of this quilt, I made an interlocking block type of back that turned out interesting.  I think I was sewing on the bindings of both of the quilts on the day before Christmas.


Both girls like their grown-up quilts.  Here they are with the first quilts I made for them ages ago.

Libby and her quilt


Katie and her quilt

Sunday, May 6, 2012

Gees Bend style Workshop

I did a Workshop for the Blue Mountain Quilt Guild on a Gees Bend style quilt.

Here's the technique in images:
build a block
cut in quarters
shuffle/rotate and sew back together

add improv pieced sashing between blocks.

Here's some of the amazing blocks the participants came up with:


What I find most amazing, is that even the fabric choices that I didn't think would work well produced interesting effects and really came together well.

I have made 4 of this style of quilt tops and have always used white or beige as the "background".  When I saw the fabrics that each participant had brought, I was sure we'd end up with some muddy, indistinguishable blocks.  I was surprised (and relieved) that everyone's blocks looked great when they were laid out.

I had everyone make 2 or more blocks at a time.  I under estimated how much time each block would take to make.  This being an improvised type of block and a room full of traditional quilters, I was surprised at how having too many choices slowed down the process.  A Bento Box block with every strip being 2.5 inches wide goes together really quick.  A wonky block where each strip is a different width, and each ring didn't have to be the same fabric and the fun of inserting little fabric inclusions in the middle of a strip all added up to the day being almost over, before everyone had 4 blocks to use for the second step.

Fortunately, everything still works with 3 blocks.  You can see form the layouts above, some have 3 blocks (12 quarter blocks) and some have 4 blocks (16 quarter blocks).  Most people had a couple more blocks on the go that they could finish at home to add to what we got done during the day.

The bottom image shows blocks made from thrifted material.  The gray is a duvet cover, the leopard and green are from sheets and the black is from a pinstriped shirt.

Mod Mosaic Workshop

I've been asked by other Lower Mainland quilt guilds to give workshops.  Actually, I've been asked to give trunk shows to 4 quilt guilds around Vancouver, and out of them was asked to do two workshops.  The Ridge Meadows Quilt Guild asked me to do a Mod Mosaic workshop on a Saturday.

Here's the blocks they created.


Then we tried some layout and background colour ideas.
These blocks were really bright and kid-like so the bright background works well.

These blocks were made from a fabric-by-the-pound sale.  How come I never find find good scraps like this?

These blocks are made from some really high quality flannel.  I don't think we actually decided on a background fabric.  On the lower left of the big block you can see where the grout fabric was one of the flannels, but didn't really stand out enough, so she switched to the cream.

This red and turquoise conbo really looks good against a tomato red.

Although these blocks are red and gray, they really popped on this orangy red fabric.

These brown and blue blocks will become a bag with the medium blue filling in between.

Elizabeth Hartman's Mod Mosaic technique can be found on her blog (Oh Fransson) by following the link.  I find that most people don't use scraps, so start by cutting one strip from each fabric you will be using.  I cut strips 3 inches wide, 3.5 inches wide, 4 inches, 4.5 inches and 5 inches.  So each fabric's strip is a different width.  These strips are wide enough so you can cut across it to produce blocks from 2 inch to 8 inch to use.  As soon as you use up a strip, cut another one, but at a different width from the one you just finished.

This was a really fun workshop to do and the process is surprisingly complicated.  I had no idea how many blocks each person would be able to make in a day, so was relieved that everyone ended up with 4 or more.  The biggest challenge was for the "planners" who tried to design each block.  I kept trying to get them to loosen up and just grab any strip to add to the block.

The other trick to this technique, is remembering to sew the grout strip between each piece.  And once you sew a grout strip on to a piece, you are committed to sewing onto the other side of the grout before adding elsewhere to the block.  If you don't you end up with 2 grout lines together...

... or a piece with no grout.

Halloween blocks for Sonja's Halloween Quilt of Awesomeness

I'm doing some catching up here...

Sonja from the VMQG is a fantastic paper-pieced block designer and her patterns appear in all sorts of magazines.  Now that she's posted the The Halloween Quilt of Awesomeness, I guess I can post these pictures.
Sonja the call out for paper piecers to test her patterns and give feedback on the instructions and difficulty level, so I volunteered.  Here's some I put together for a Halloween quilt she was creating.
Larry from the Black Lagoon

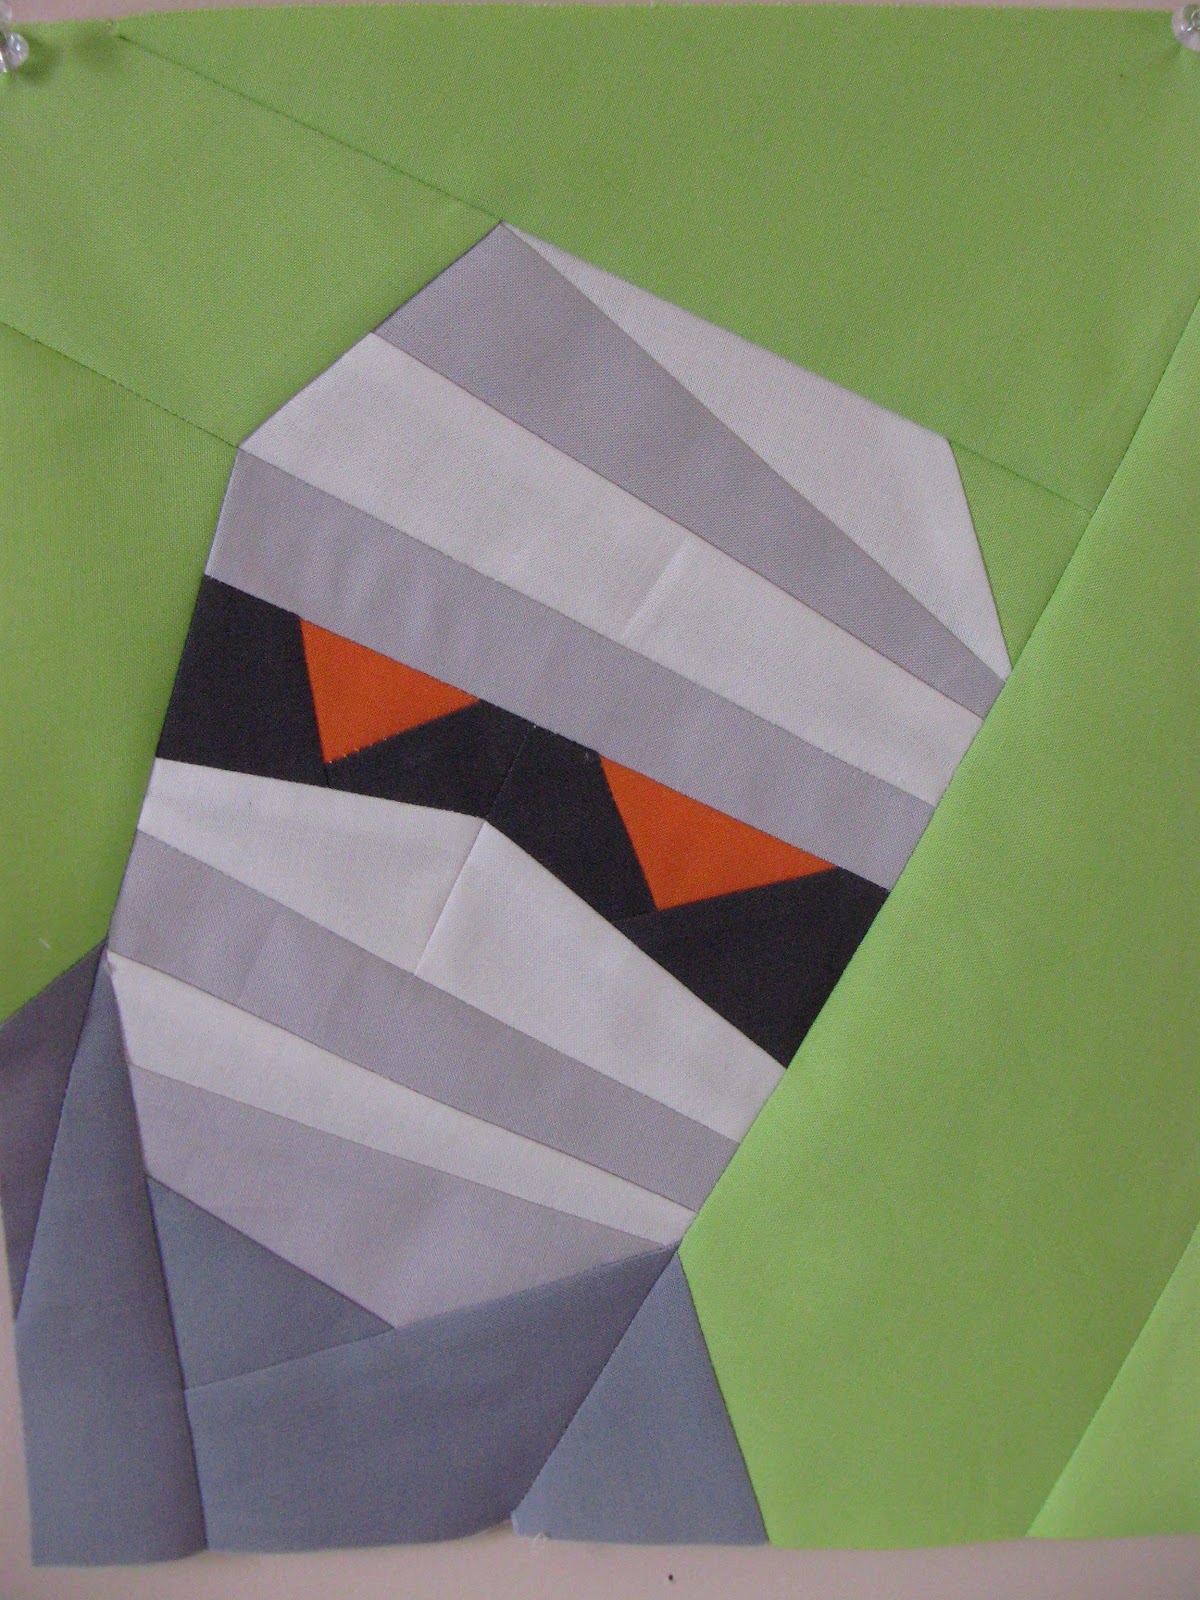
Mumford the Mummy
I also tried a Mrs Mummy.  I think she need pearl earrings and necklace made with sewn-on shirt buttons.  That would be very Mrs. Cleaver, I think.  I shot them on "barnwood" as that's a very etsy thing to do.

I also made a wolfman.  The request was it had to be a plaid shirt.  The hair didn't have enough contrast against the night sky, so I had to do another one with a lighter sky that turned out much better. 
attempt 1

attempt 2
There was also the monster Frank.  Here's the ones I passed back to Sonja.  I changed the lagoon to blue as she wanted the lagoon solid and not bubbly and murky.
Here's Sonja's finished quilt from her Flickr page.

The Halloween Quilt of Awesomeness by sonjaartisania 
The Halloween Quilt of Awesomeness, a photo by sonjaartisania on Flickr.
Be sure to click through Sonja's pictures to see close-ups of the quilting.

Sunday, November 27, 2011

Girlfriends Quilt update

I finished the Girlfriends quilt and it's now ready for the silent auction at our upcoming band concert.
 I used the same red for the binding that was used in three of the picture mats.
 And I found some great plaid flannel for the back.  Perfect for these outdoorsy girls.  The birdwatching girl is actually wearing a plaid bikini!
 The stippling is a big curvy stipple and the frames are just quilted with straight lines 1/4 in in from the edges.
I took it into rehearsal on Thursday and the band members love it, so I think it'll be a hit and will hopefully get some high bids.

Saturday, November 12, 2011

Girlfriends Quilt

I'm putting a quilt together for a silent auction for my upcoming band Christmas concert. It's on December 11, so there's not too many practices left and not too many days to get the quilt done.
DSC_0605 by sonjaartisania
DSC_0605, a photo by sonjaartisania on Flickr.
Last year I made a beef-cake pin-up Christmas tree skirt for the auction, so this year it's pin-up girls.
I bought some pin-up girls camping material a while ago that I thought was very funny. Unfortunately there are only 4 girls and they repeat quite often. I fussy cut out four of them and framed them in a beige fabric that matched the base colour of the girl fabric.
Then I put a red or green frame around that to set it off. Next I put a wide strip around the entire block to get it up to about 16 x 16 inch block.
Ice skating with no pants
Birdwatching in a bikini
Next I put a "boy scout" style frame around each girl like I did on the back of my Wonky Nine Patch Lattice quilt.
This was going to be another tree skirt, but after making 4 blocks, I saw that it needed to become an entire quilt.  I made two more blocks using combinations of the girls so they didn't look identical to the others.
I laid out the blocks and moved them around so that they didn't line up and were scattered around.  Then I filled in the empty spaces strip by strip and got the quilt all together.  I pretty much ran out of fabric so had to "Frankenpiece" the last empty space.
I made a run to the fabric store and got some more background fabric to give the quilt a little more length on the top and bottom.  I found the perfect back for the quilt - a great flannel plaid that matches the bird-watching girl's bikini.  It's perfect for the goofy out-doorsy feel of this quilt.

Now it's time to sandwich it, quilt it and bind it and it'll be ready to show off at the November VMQG meeting.